The Bear Essentials
10 tips for photographing bears
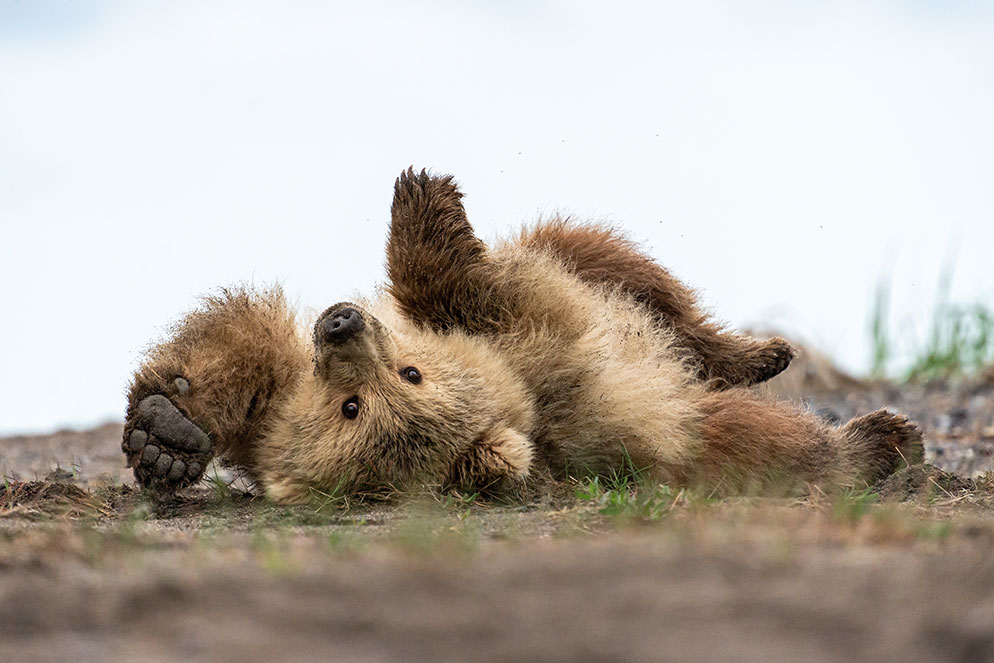
Lake Clark National Park, Alaska. This was a second-year cub who was curious about photographers. He approached very close, always with his mom in sight, and started playing with a stick, rolling in the sand. I laid down on the ground to get this eye level image of curious bear playtime behavior. D6, AF-S NIKKOR 180-400mm f/ 4E TC1.4 FL ED VR at 560mm focal, 1/1000 sec, f/5.6, ISO 1800, manual exposure.
Click, click, click…Camera shutters are blazing away around me, in remote Alaska, of a sow and her cubs wrestling in the grass right in front of our group. Bear photography at its finest!
I’ve been leading bear photography workshops for over 25 years, and I just can’t get enough. There’s something about those bears that keeps me coming back year after year. Recently bear photography trips have become very popular, everything from photographing black bears in the Smoky Mountains to capturing images of polar bears in Svalbard, Norway. And if you take a trip to Yellowstone National Park, Glacier National Park or Alaska, your chances are good for seeing a grizzly.
Bears are apex predators, so knowing how to safely get a great image is important. Below are 10 tips I’ve learned through the years. Try these out on your next bear photography adventure, with the goal of not just taking a snapshot, but making a great photograph.
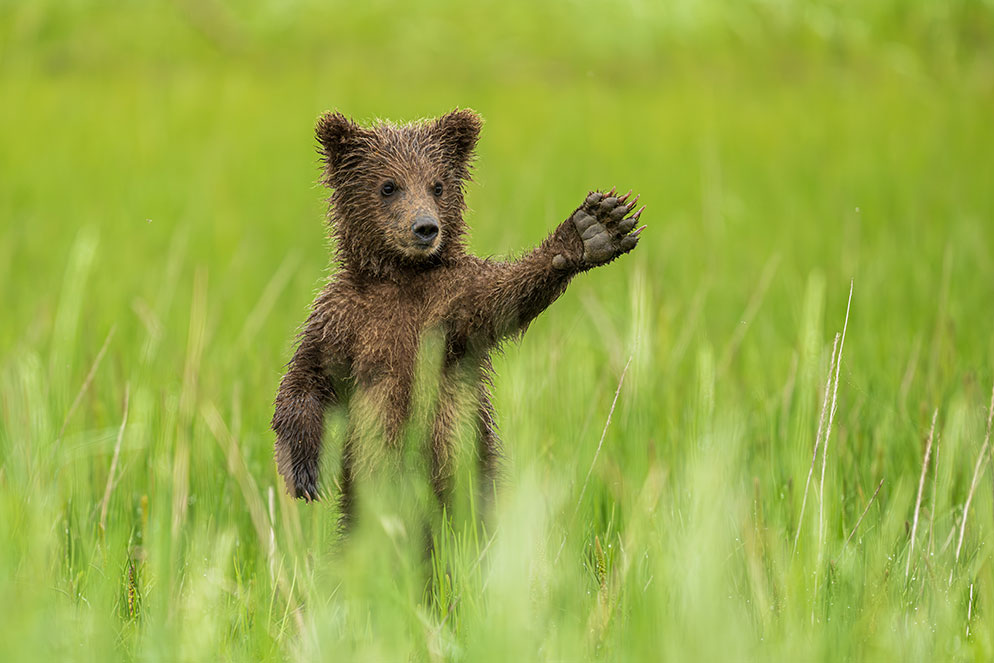
Lake Clark National Park, Alaska. Waving bear. This spring cub kept watching our group as we photographed it. Suddenly it just stood up and began waving its paw at us…as if trying to figure out what we were doing. Being ready for those quick spontaneous moments. Z 9, NIKKOR Z 400mm f/2.8 TC VR S at 560mm focal length, 1/2000 sec, f/4.0, ISO 1100, manual exposure.
Tom's Top 10 Tips
1. Be Safe. Bears might look cuddly, but they are powerful, wild animals. Don’t push your luck and become the next viral video sensation. Instead, photograph from a safe location or use a guide. Many polar bear photography trips involve shooting from a vehicle or boat, and park rangers manage visitors at popular bear viewing areas. Consider using a guide, especially if you’re on foot searching for bears. I always use guides for my bear photography workshops. They have significant bear viewing experience and understand bear behavior. Guides will know the local terrain, and get you in the perfect spot at a safe distance for that tree climbing cub photo.
Lake Clark National Park, Alaska. Cubs are always a great photo subject. Their curious, playful nature often results in great images. These two sibling cubs wrestled for hours, oblivious to the photographers taking their photo. NIKON Z9, NIKKOR Z 400mm f/2.8 TC VR S, 1/2500 sec, f/5.6, ISO 2800, manual exposure.
2. Shoot at eye level. Being at eye level with bears will often transform your images into much better photographs. Why? First, viewing at eye level gives you a more intimate perspective and better connection with your subject. Second, backgrounds will change, often resulting in less distractions. If you have trouble getting down low, and if your camera has a tilting or swiveling LCD, try focusing with your LCD tilted up. Hold the camera near the ground or use a tripod. Practice at home so you can do this quickly in the field. Sometimes you’ll encounter bears on bluffs or small hills, and in those instances, you’ll be at eye level while standing.
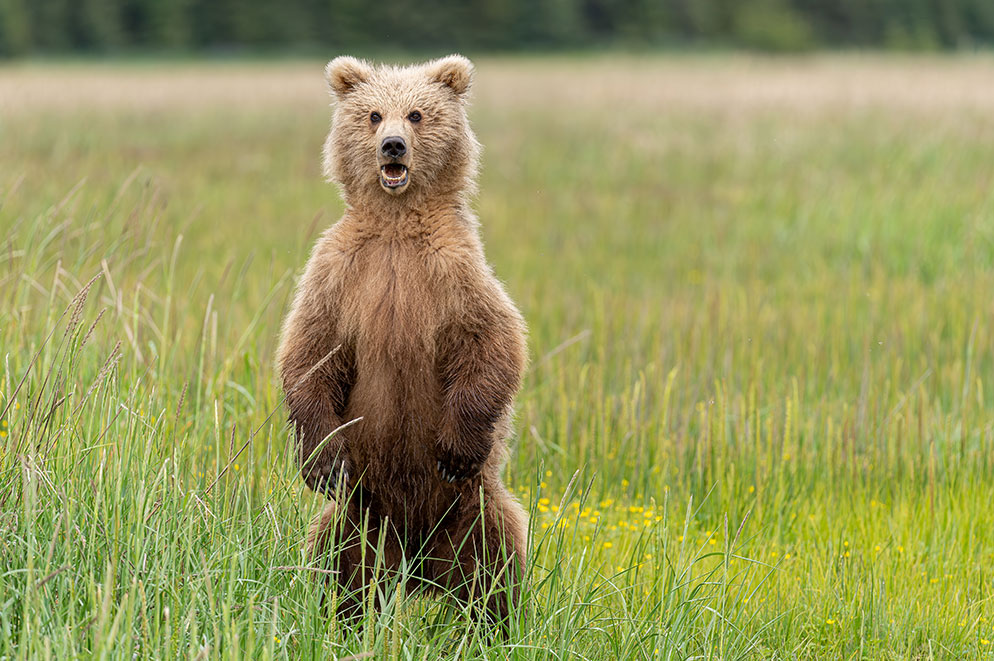
Lake Clark National Park, Alaska. This was classic behavior. This bear was surprised when another bear approached, so it stood up to see the other bear. This is common bear behavior, and I was waiting for the moment when it happened. D6, AF-S NIKKOR 500mm f/5.6E PF ED VR, 1/1250 sec, f/5.6, ISO 560, manual exposure.
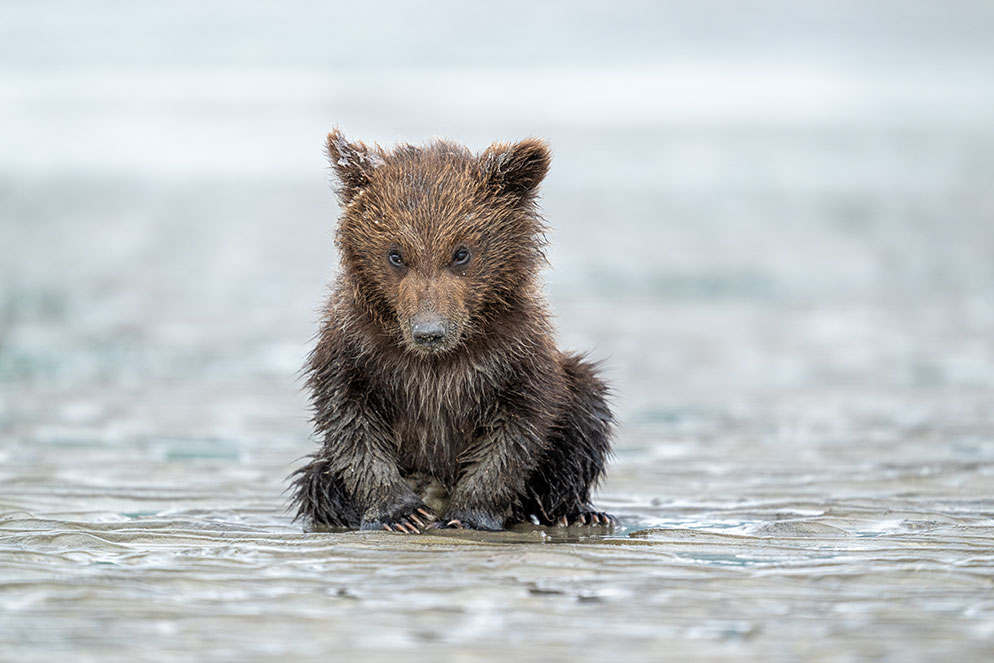
3. Watch for the cubs. Capturing emotion in wildlife photography leads to award winning images, and bear cubs exude emotion at every level. If you find bear cubs, you’re in for a treat. Cubs love to play, wrestle, climb, scratch, whine, nurse, and all these behaviors offer great photographic possibilities. I watched a spring cub try to steal a clam from her mother which resulted in the sow swatting the cub away. The cub just sat in the mud looking dejected, you could almost feel the rejection. But this cub image became one of my most popular bear photographs. Stay alert when photographing cubs, things change quickly.
Lake Clark National Park, Alaska. The dejected cub…This cub tried to steal a clam from its mother, who swatted it away to let the cub know some boundaries. The cub just sat there looking completely rejected…like this is the worst moment ever. But a few minutes later he rejoined mom and started digging for clams. Z 9, NIKKOR Z 400mm f/2.8 TC VR S at 560mm focal length, 1/800 sec, f/4.0, ISO 560, manual exposure.
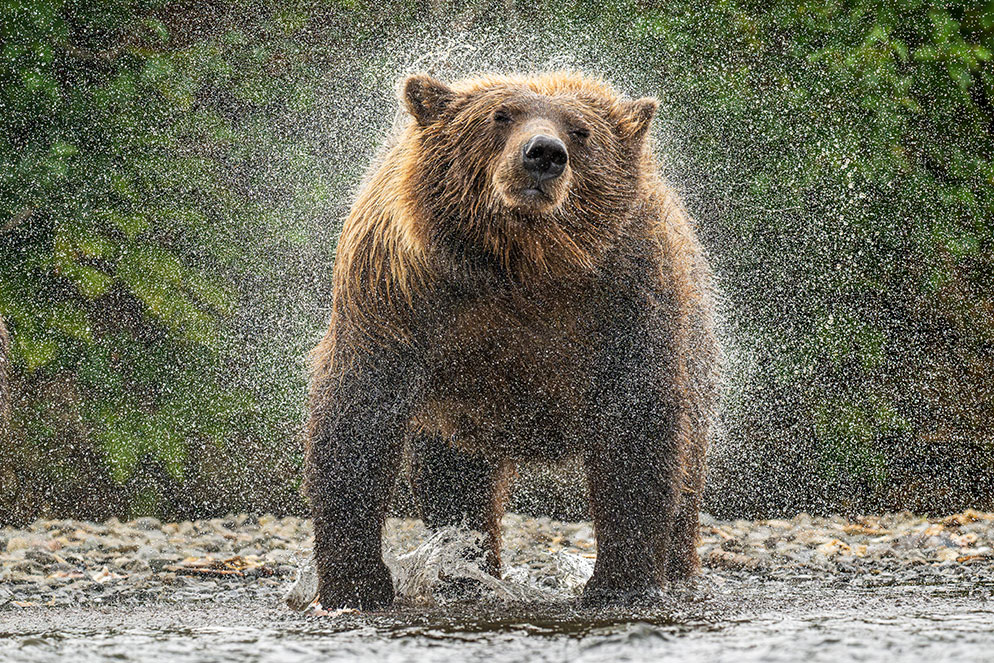
4. Shoot at a fast frame rate/shutter speed. Most of today’s cameras have very fast frame rates, and photographing bears is the time to use them. Fishing and fighting bears require fast frame rates, while a sitting bear could be photographed at a slower rate. I like to use a fast frame rate for wildlife photography, usually 20 FPS, which I can do with the Z 8 and Z 9. If you don’t have one of these cameras, just set yours up so you’re shooting at the fastest frame rate you have. Fighting or fishing bears move really fast, and you don’t want to miss a red sockeye salmon being caught by a huge grizzly. I shoot at shutter speeds of 1/1000 and faster for quick action. Bears fishing in the water need really fast speeds; try shooting at 1/2000 or faster to freeze the splashing water.
Katmai National Park, Alaska. Spin cycle. This large brown bear was fishing in a stream and catching a lot of salmon. After every fishing run the bear would shake off the river water. What made this shot special was this bear was looking right at me as he sprayed water, creating a nice symmetrical composition. Z 9, NIKKOR Z 100-400mm f/4.5-5.6 VR S, 1/3200 sec; f/5.6; ISO 4000; manual exposure.
5. Recognize behavior. Everyone likes capturing a standing bear, and here is a tip to get that shot. Back away from your camera and look around. Are there other bears or people approaching? Bears are curious and sows are always on alert for danger to their cubs. If you see a bear feeding and it isn’t aware of another bear approaching, get ready. When the bears see each other, exciting behavior generally follows. Sometimes a sow and cubs will stand at the same time, or a young bear may run off at high speed. Understanding the bear’s behavior and body language will help you get unique photographs and stay safe.
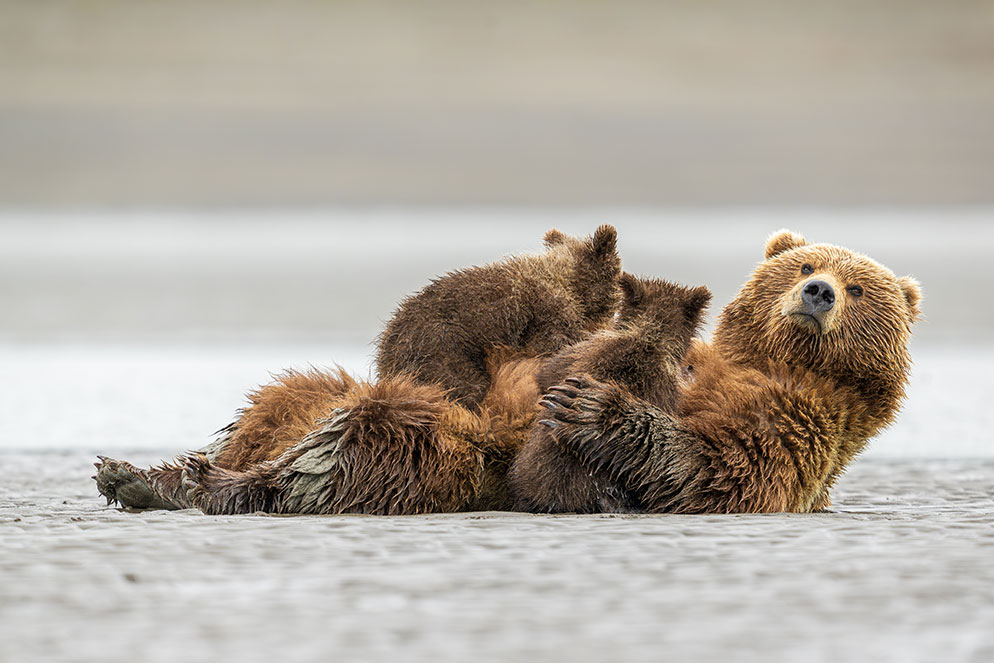
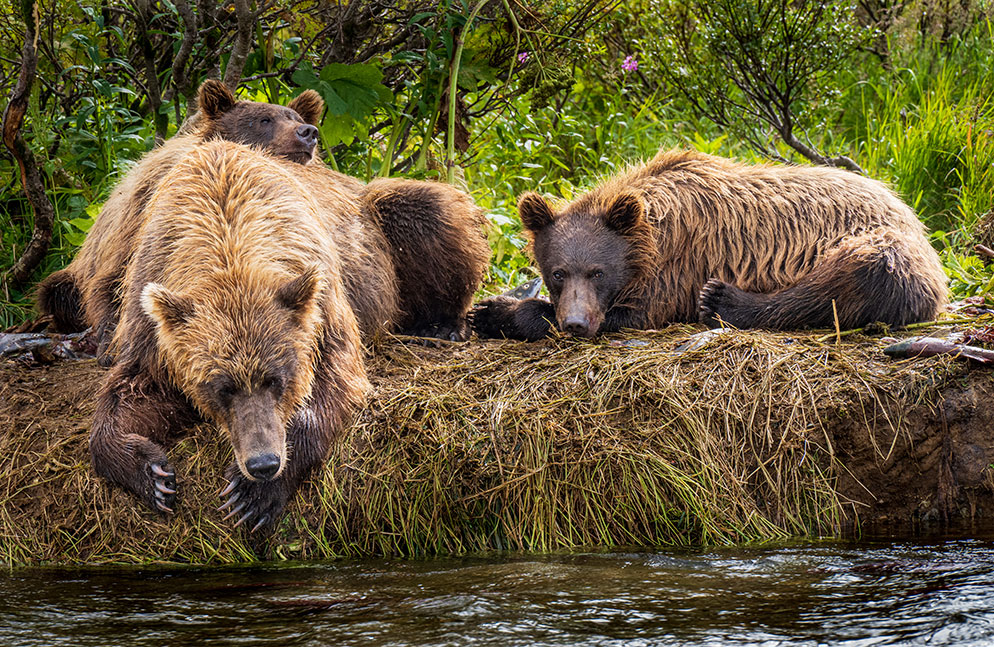
Lake Clark National Park, Alaska. Nursing sow with spring cubs. First year cubs, known as spring cubs, are exciting to photograph. They always stay very close to mom. This sow just laid down on the beach to nurse her cubs, a sign she was comfortable with photographers nearby. A special moment… Z 9, NIKKOR Z 400mm f/2.8 TC VR S, 1/640 sec, f/5.6, ISO 1250, manual exposure.
6. Selecting the aperture. Choosing the right aperture is very important in wildlife photography. Bokeh—quality of the out-of-focus background—can make a big difference in the final image. If you have a cluttered background close to your subject, shoot wide open to blur the background, which will give you clean separation from busy backgrounds. Or try photographing close to the ground to change your perspective. Also, I don’t just consider the background, but also the ground when choosing my aperture. Photographing bears walking on mudflats using my 400mm f/2.8 lens at f/2.8 creates a slice of acuity and ethereal effect, even the ground seems to drift away. I love this effect, but it is a creative choice. However, if you’re pretty close to your subject, you may need more depth of field to get enough sharpness across the bear’s head, eyes and nose. Try using f/8 or f/11 to get everything sharp.
7. Better gear, better photos. When I first started photographing bears, I was using a film camera with a manual focus lens. Every 36 frames I’d have to change my ISO 100 film, and five frames a second felt really fast. My keeper rate of good photos was pretty low. But we’ve come a long way, and today’s digital cameras vastly improve your odds of capturing good photos. Autofocus with subject detection has really changed the game. I like to use my Z 9 or Z 8 in 3D autofocus with animal eye detection. All I have to do is get the focus point near the bear’s face and the camera will lock onto the eye. This really helps with fast action and using shallow depth of field. I also love the new Nikon telephoto primes with built-in teleconverters. On my 400mm f/2.8 I just flip a switch and the lens goes to 560mm at f/4. High ISO performance has really improved as well, and I regularly shoot at ISO 6400 with good results. Photographing in dark overcast conditions is no longer a problem. Another benefit of newer mirrorless cameras like the Z 8 and Z 9 is using the SILENT mode or turning off the shutter sound on those cameras to be as steathily as possible while photographing wildlife.
Churchill, Manitoba; driving in a tundra buggy we came across this mother and cub resting near some trees. These bears were waiting for the sea ice to form to head out and hunt seals. D4, AF-S NIKKOR 200-400mm f/4G ED VR II, 1/200 sec, f/5.6, ISO 1000, Aperture priority.
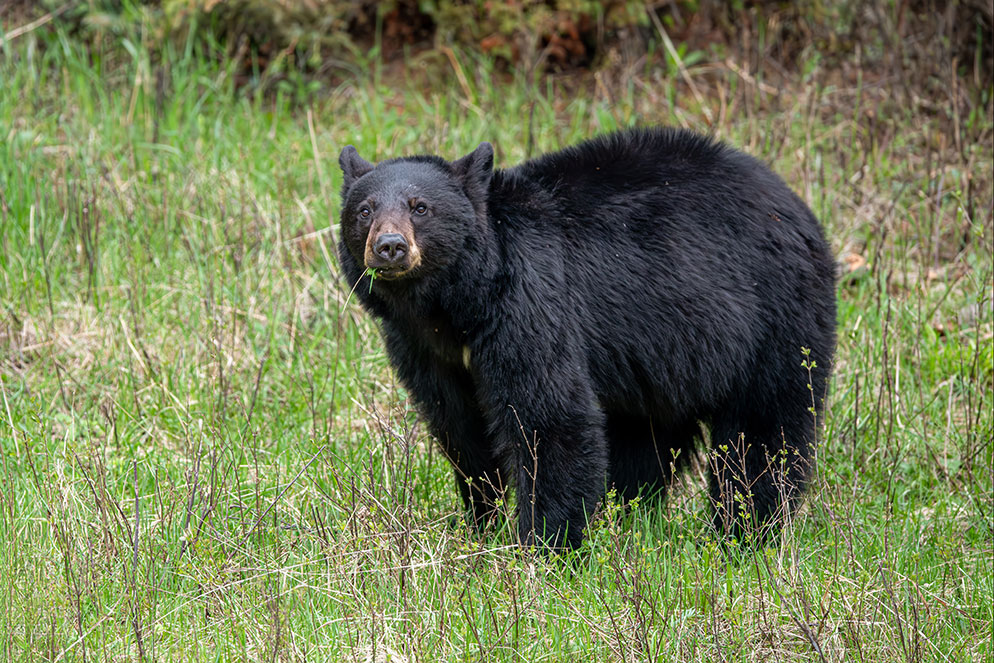
The Lamar Valley in northern Yellowstone National Park has amazing amounts of wildlife, especially in late spring. Many animals feed there, including bears, waiting for the snow to melt in the high country. This black bear was feeding near the Lamar River. D850, AF-S NIKKOR 600mm f/4E FL ED VR, 1/800 sec, f/4.0, ISO 3200, Aperture priority.
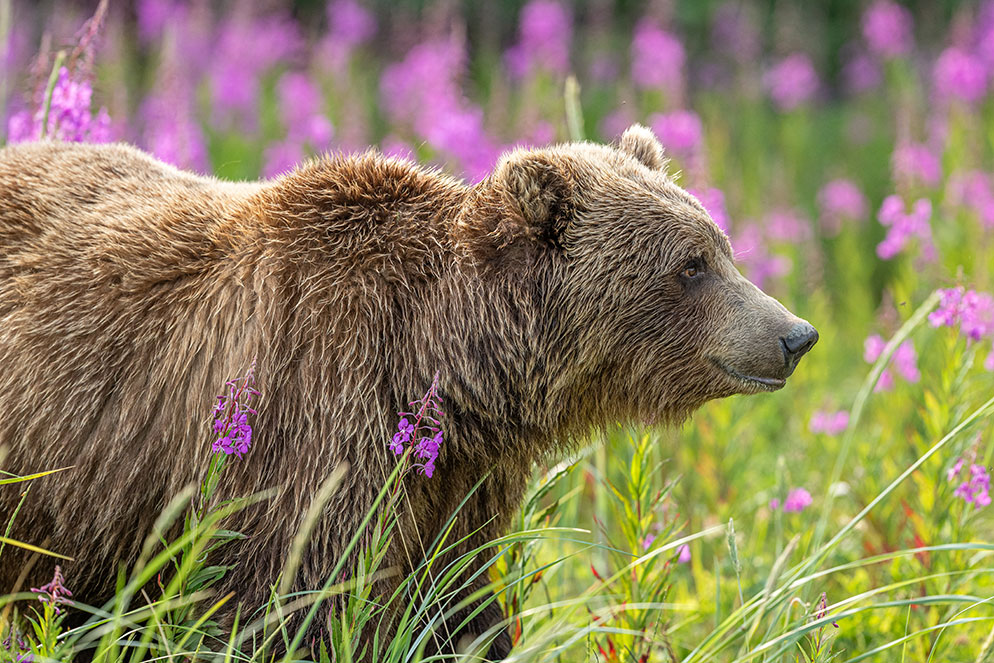
8. Mix up your coverage. During my bear photo workshops I often see participants initially try to get the perfect close-up head shot. But after getting that image I encourage them to mix up their coverage. How about just focusing on the bear’s claws? Or how about an environmental image that shows more of the landscape? What about trying to photograph a bear in flowers versus in a stream? Experiment with different lighting angles as well. Backlit bears look amazing with bright rim light on their fur. Try overexposing images for a high key look or converting to black and white. I like to approach my wildlife imagery from a narrative perspective. Tell a story about the bear, and this will encourage you to seek out fresh perspectives.
Lake Clark National Park, Alaska. Bears are powerful, sometimes fierce animals, and often portrayed that way in images. I was very excited to find this brown bear walking through a field of pink fireweed flowers. The flowers tell a different story about bears, more about a beautiful animal living in a magnificent landscape. Z 9, NIKKOR Z 400mm f/2.8 TC VR S, 1/2500 sec, f/4.0, ISO 640, manual exposure.
9. Be patient. Photographing bears can be very exciting and fast paced. Or you can wait for hours for something interesting to happen! Be patient, observe the bear’s behavior, and hope for special moments. I once found a young bear in Alaska fishing for salmon in a creek. Every five minutes he would run through the stream chasing bright red salmon, but he never caught one. I was sure this bear would finally catch a fish and I would have a great image. But after two hours of lying prone on river rocks I could hardly move, and the bear still hadn’t caught a fish. He swatted at another salmon in the river and missed. Suddenly he stood up on two legs and began moving his paws in a circular motion. Water sprayed off his paws in big circles, creating a memorable shot. I had never seen a bear do this, and thankfully my patience paid off with some unique photographs.
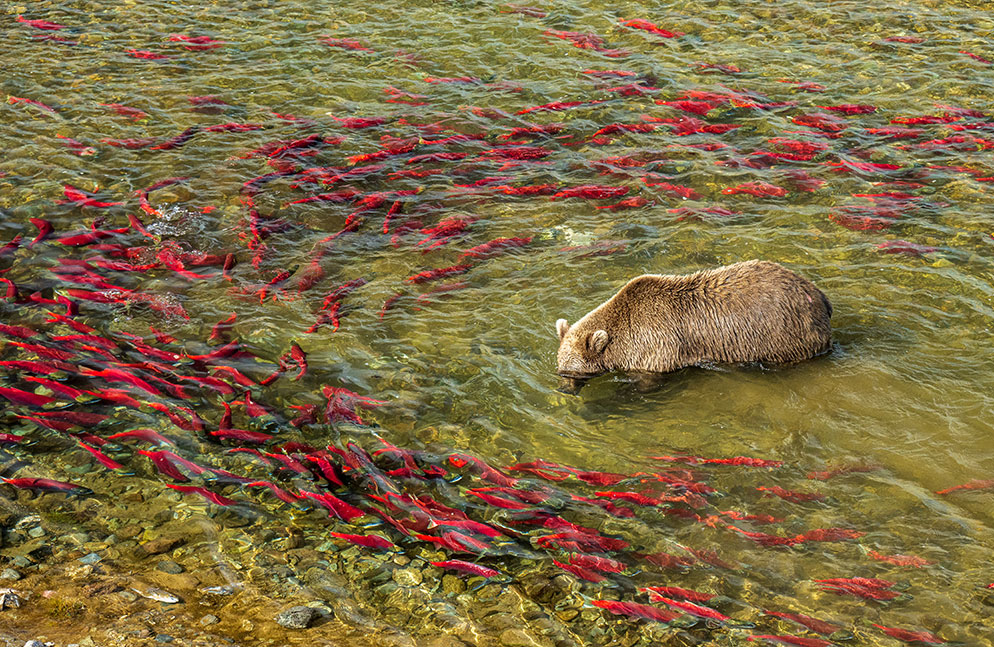
Katmai National Park, Alaska. For years I wanted to create an image showing brown bears fishing in a huge school of red sockeye salmon. But I needed a high perspective, sunny weather, sockeye salmon, and a bear ‘snorkeling’ through them. I was hiking along a high bank over a river and found this scene…one of my favorite bear images! Z 7II, NIKKOR Z 24-200mm f/4-6.3 VR at 115mm focal length, 1/400 sec, f/6.3, ISO 400, Aperture priority.
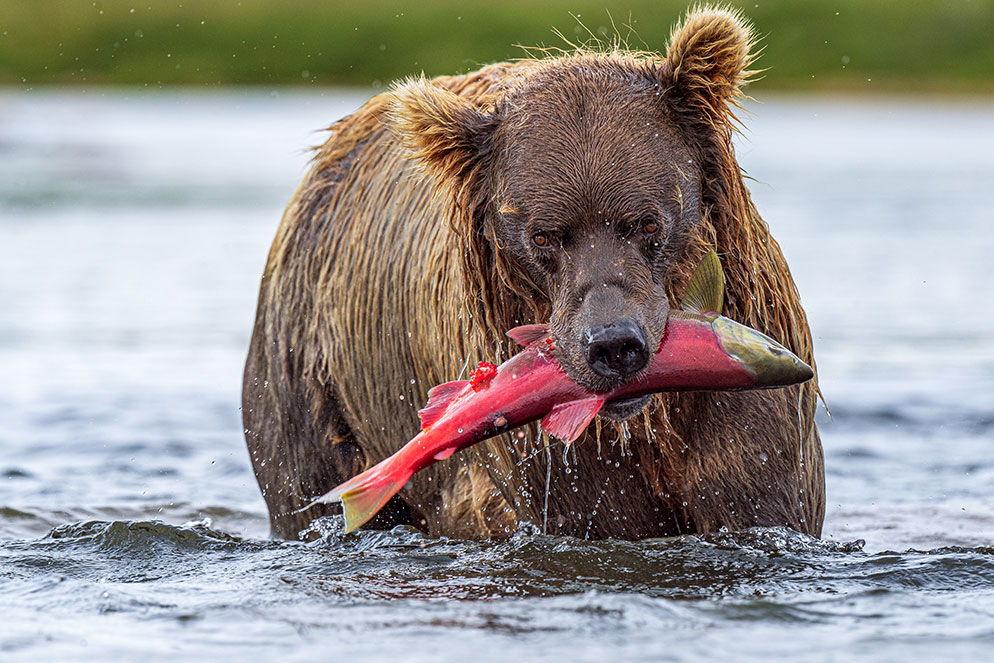
Katmai National Park, Alaska. The sockeye salmon run in Bristol Bay is the biggest in the world. I was photographing along a stream that spawning salmon travel up from Bristol Bay. This huge grizzly bear kept catching fish after fish. These coastal grizzly bears are known as brown bears. D6, AF-S NIKKOR 500mm f/5.6E PF ED VR; 1/1250 sec, f/8, ISO 640, manual exposure.
10. Bad weather is good weather. I do most of my bear photography in Alaska, and it is not uncommon for it to be raining, snowing or freezing, but these are good things! Atmospherics add mood and emotion to an image. Bears don’t change behavior in drizzle, they just keep eating, playing and wandering. Fog and light rain can make interesting backgrounds. But if it rains really hard, the limiting factor will be sharpness in your image. Heavy rain can appear like a haze in images, especially on distant subjects using telephoto lenses. Shutter speed is important. I like to shoot at 1/500 or faster to freeze the rain droplets. Don’t let bad weather slow you down, dress for the conditions, and bring rain covers for your gear.
I’m headed back to Alaska in a few weeks for more photography, I just can’t resist spending more time with those grizzly bears. Who knows what will happen this time. Maybe more cubs will be playing in the meadows, or bears will be chasing salmon in the river. Only one way to find out, time to head north and spend time with the bears… Happy shooting!

